


 English
This page show you how to set up your email account in Thunderbird. We realize some of the screenshots are in German.
After starting Thunderbird the first time after installing, the new account wizard runs automatically to help you set up a new email account. However, first you will have to skip the following dialog by clicking on “Skip this and use my existing account”.

If you have already set up an account, you need to start the wizard manually, e. g. by opening the menu File → New → Existing mail account.
Then, this window should appear:
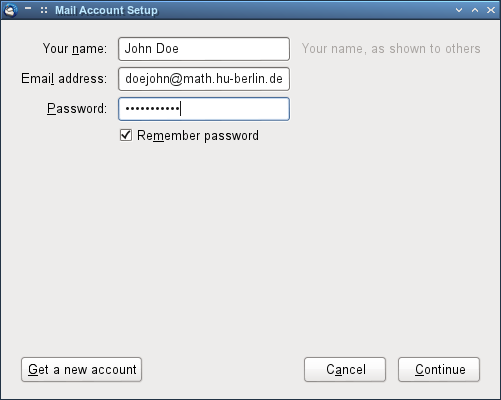
Please enter:
Your name, e. g. “Jane Doe”
[account name]@math.hu-berlin.de, e. g. doejane@math.hu-berlin.de
Your password
After clicking “Continue”, Thunderbird automatically looks for the appropriate settings. If the window looks like this (apart from the username, of course), everything went well.
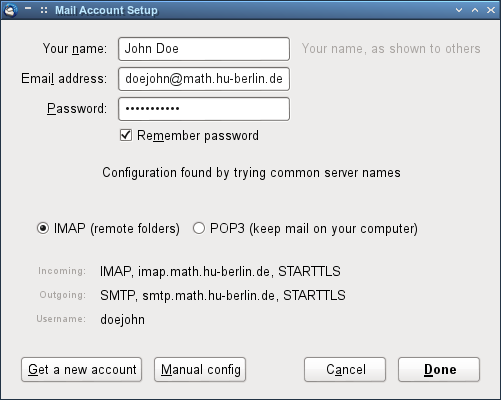
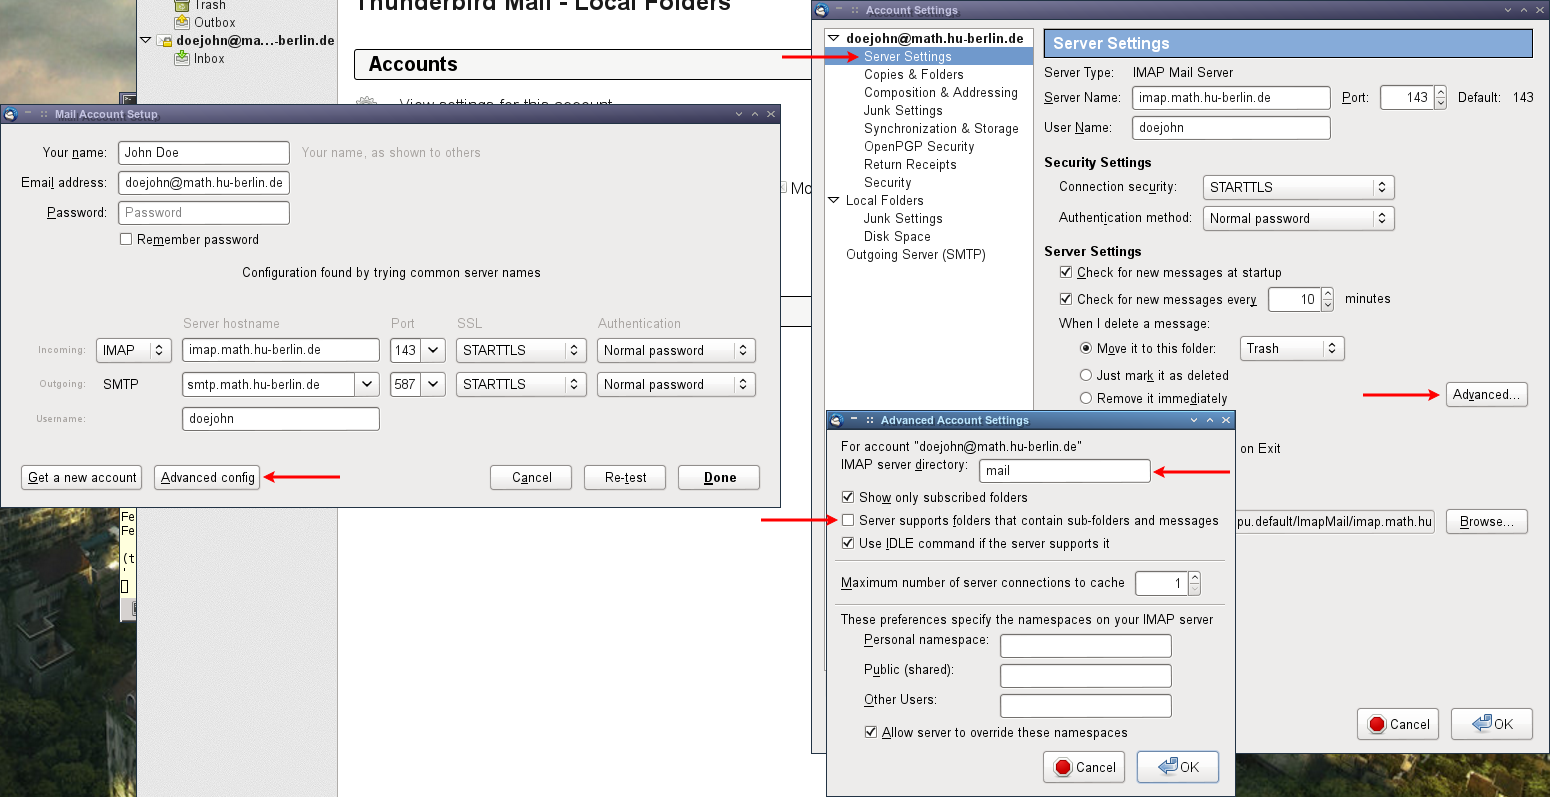
If not, please click on “Manual config” and enter the following (replacing doejohn by your username):

Where “Incoming” should be “IMAP” and “imap.mathematik.hu-berlin.de” on port 143 and “Outgoing” should be “smtp.mathematik.hu-berlin.de” on port 587; both should be set to STARTTLS and authentication should be “Normal password”.
Now please click “Re-test”. If Thunderbird still cannot find the servers, there may be something wrong with your connection.
Next you need to change some additional settings. Please click on “Advanced configuration, then on “Server Settings” for the appropriate account, and then “Advanced …”. There, please set the IMAP server directory to “mail” and remove the second checkmark (“Server supports folders that contain sub-folders and messages”). Then close the dialog window by clicking OK.
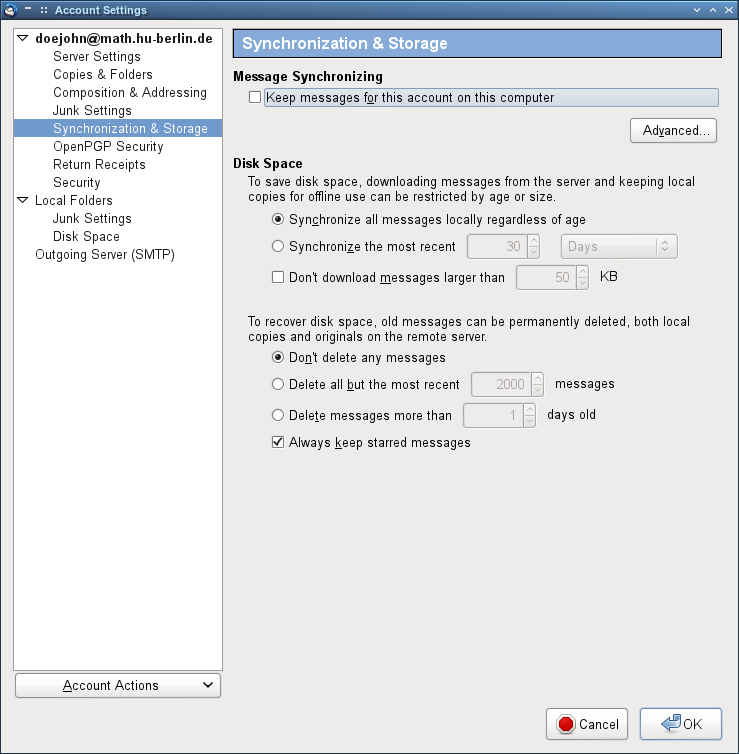
Especially when using you math account at the university, we recommend to not save your messages locally to save space. To do that, go to “Synchronisation and Storage” and remove the checkmark before “Keep messages for this account on this computer”. Now you can close the dialog by clicking OK.
You can now finish the wizard by clicking “Done”.